
Origami Four Leaf Clover
Made this origami? Comment and Submit your photo using the comment box at the end of this page!
We do have another origami four leaf clover that requires folding 4 of the same units.
This one requires folding only 2 of the same unit. And it is held together tightly without any glue or tape!
Fold both and let us know which one you prefer!
Please note that the 3 leaf clover (shamrock) is the proper symbol for St. Patrick's Day, if that's what you're looking for.
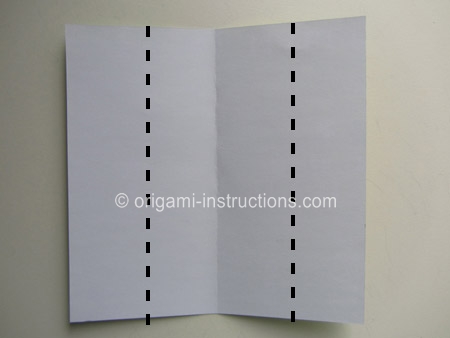
Origami Four Leaf Clover Step 1: Start with a 6 inch x 6 inch (15cm x 15cm) square origami paper, color side down.
Fold paper in half. Crease well and unfold.


Origami Four Leaf Clover Step 2: Fold both left and right sides to meet in the center.

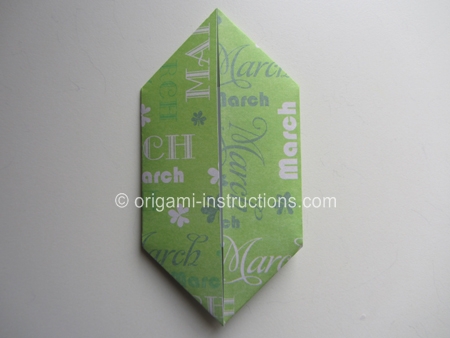
Origami Four Leaf Clover Step 3: Make 4 mountain folds on the diagonal. This is in preparation for making inside reverse folds. Crease well and unfold.


Origami Four Leaf Clover Step 4: Now use the creases you made to help you make 4 inside reverse folds . This is a common folding technique in origami. Please check out the separate page for more info.
Basically what you want to do is tuck the corners in between the 2 sides of paper. So open paper slightly and push the top left and right corners in. Then press paper flat.

See how the top left and right corners are now tucked in between the 2 sides of paper?


Repeat the inside reverse folds for the bottom half.

Origami Four Leaf Clover Step 5: Flip paper over. Fold the top and bottom tips (top layer only) to meet in the center.


Origami Four Leaf Clover Step 6: Flip paper over again.
Now we need to fold both the right and left sides to their outer edge.

Pry open the paper and fold the right side to the outer edge. This will be more challenging if you're using thicker paper like printer paper. The paper will seem to resist but as you can see below, it can be done!

Make a squash fold at the top. Notice how the vertical creases line up.


Make a squash fold at the bottom too.

Repeat for the left side.

Origami Four Leaf Clover Step 7: Fold both the right and left sides back to the center.


Origami Four Leaf Clover Step 8: Almost done! Fold both the right and left sides to the 1st crease line.


Origami Four Leaf Clover Step 9: Flip paper over and you're done with the first unit! Repeat Steps 1 to 8 and fold another so that you've 2 of these.

Origami Four Leaf Clover Step 10: Now we just have to put them together. It's real easy. Just slide one over the other.
The "tips" of the "hearts" hold both units together snugly and won't fall off! We really like that!


and your origami four leaf clover is complete! Give one to a friend that needs some extra luck!
