
Origami Tato Folding Instructions
Made this origami? Comment and Submit your photo using the comment box at the end of this page!
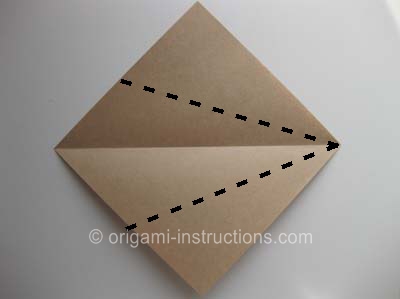
Origami Tato Step 1: Start with a 6 inch x 6 inch (15cm x 15cm) square origami paper, color side down. Fold along the diagonal axis. Crease well and unfold.


Origami Tato Step 2: Starting from the right side, fold both top and bottoms to meet in the center. Crease well and unfold.

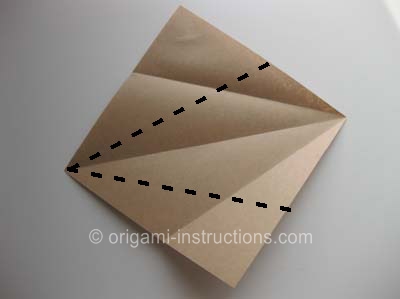
Origami Tato Step 3: Now starting from the left, fold both top and bottom to meet in the center. Crease well and unfold.

Origami Tato Step 4: Bring the top half to meet the center crease. As you do so, the left and right sides come together in the center. Just press the paper flat to one side as shown below.


Origami Tato Step 5: Repeat Step 4 for the bottom half of paper.

Origami Tato Step 6: Rotate the paper 90 degrees counter-clockwise so that this is what you see.

Origami Tato Step 7: We now need to make a squash fold.
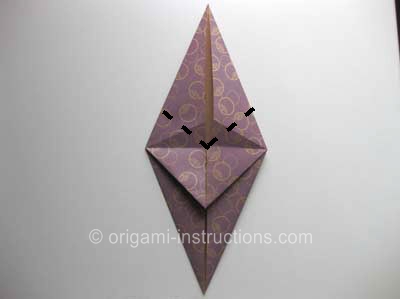
Pry open the paper slightly then crease paper on the diagonal.
Closed-up view:

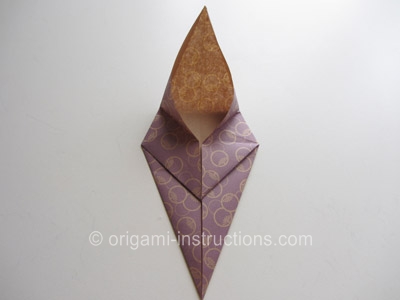
Origami Tato Step 8: Then proceed to bring the tip down and squash the paper flat, completing the squash fold.
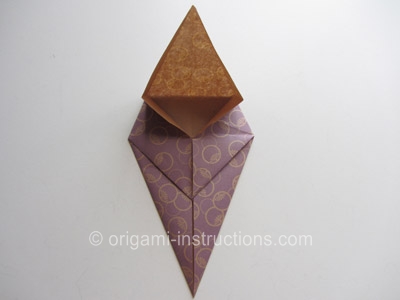
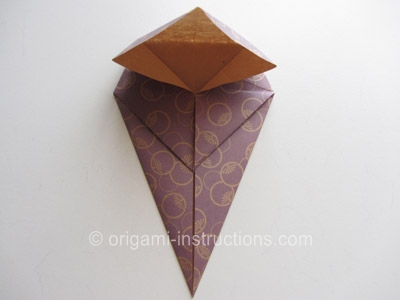
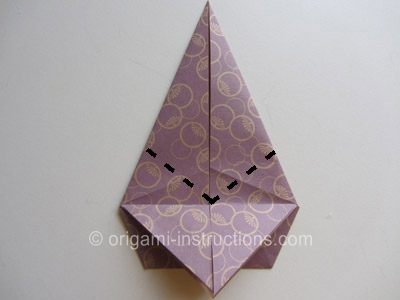
Origami Tato Step 9: Now fold the top flap up as indicated by the dotted line below.


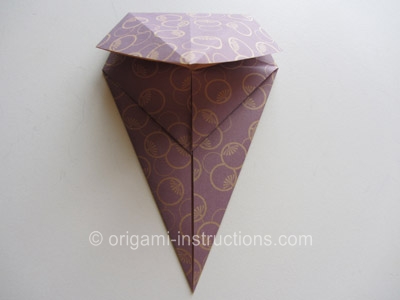
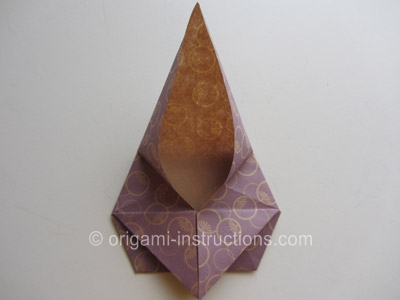
Origami Tato Step 10: Fold the 2 flaps up as well.

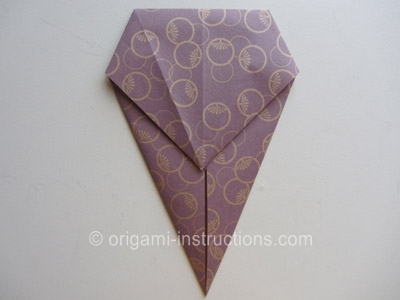
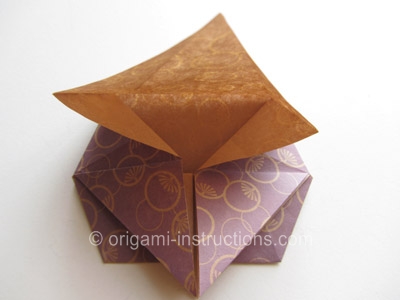
Origami Tato Step 11: Rotate the paper 180 degrees so that you see the following.

Origami Tato Step 12: We're going to repeat Steps 7 and 8 and make the squash fold on this side.
Pry open the paper again, and make the 2 diagonal creases.
Bring the top tip down and press the paper flat completing the squash fold.

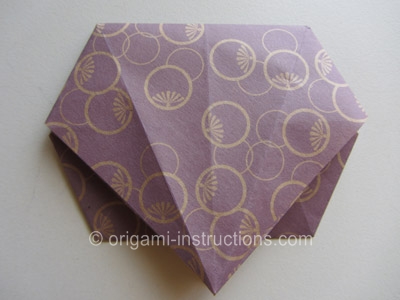
Origami Tato Step 13: Now fold the top flap up where indicated by the dotted line.


Origami Tato Step 14: Bring one of the 2 center flaps over like so.

Origami Tato Step 15: OK, I'm going to rotate the paper 90 degrees.

Origami Tato Step 16: Bring the top flap to the center, pry it open and squash it flat.


Origami Tato Step 17: Fold up the center tip.


Origami Tato Step 18: Repeat Steps 16 and 17 for the bottom flap by first making the squash fold and then folding up the tip.


That's it! Your origami tato is completed! Now, maybe it doesn't look so special but pull on both the right and left tips and it opens up! It is really cool!


The origami tato can be used to store flat items like paper clips, pins, needles,etc. Here's the origami tato filled with paper clips.

Check out the many origami tato photos that have been submitted by our readers!